Hey fellas!
My name is Jéferson Sartor Decker, I’m a Software Developer in Thoughtworks Brasil and live in Porto Alegre! Matheus invited me to make a post here, so I hope you enjoy it!
What we’re going to use?
Github: A web-based service for version control, that uses git and is free to open source projects <3 !
Heroku: As they said in their site:
Heroku is a cloud platform that lets companies build, deliver, monitor and scale apps — we’re the fastest way to go from idea to URL, bypassing all those infrastructure headaches.
And is also free with some restrictions. Remember that Heroku support for default the languages below:
- Javascript
- Ruby
- PHP
- Python
- Go
- Scala
- Clojure
Heroku CLI: Heroku Command Line Interface.
Travis-CI: A continuous integration service, that builds and tests code in Github and also is free to open source projects <3 !
Travis-CI CLI: Travis CI Command Line Interface.
Let’s get started!
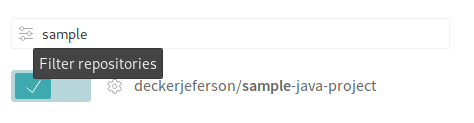
So, first of all we need to have a project on Github, I’ll create a sample Java + Spring project, just to have something to build and deploy. You can do this to any project that you already have in your Github! My project is the ‘sample-java-project’, as you can see in the next image:

Connecting Travis to your Github Repository
Now, you need to enter in Travis CI and connect it to yout github account. Enter in “My Repositories” and then turn on the Travis-CI to your project.
Creating your Travis Configuration File
Awesome! Now that we have the Travis connected to our repository, all we need to do is create a YAML file to configure Travis settings. To do that go to you repository and create a file called “.travis.yml”. Now, you should add information to the YAML file, to Travis knows what it should do with you build. I’ll keep it simple, as you can see in my file below. If you want more information about customizing build, you can find it here.
# Language that we'll use in out project
language: java

# In java, the SDK that we'll use
jdk: oraclejdk8

# Information about deploy
deploy:
    # Provider that we'll use
    provider: heroku

    # The name of the application that we'll create in heroku
    app: sample-java-project
Creating the App in Heroku and Adding the Heroku App Key in .travis.yml
Now that we have a repository linked to Travis, we need to create our Heroku Application. To do that we login in in Heroku and click in “New” and then in “Create new app”. After we’ve done that, we complete the App Information, as the image below.

After we’re done with that, we go to the project folder and run the following command(It’s important to be logged in in Heroku CLI):
travis encrypt $(heroku auth:token) --add deploy.api_keyThis command will get your and encrypt it Heroku Token and after that, add it to the .travis.yml file. Doing that Travis can access you Heroku to deploy your application.
Now all you need to do is to push this changes to your repository and in instants the build in Travis will start! 😀

And when it’s done and the build is green

We’ll have our code deployed in Heroku!

Thanks for your time and attention!
If you have any questions, fell free to ask! 🙂
Bye and stay curious! <3
Pingback: Automating your Github Project’s build and deploy with Heroku and Travis — GREPORA – SutoCom Solutions